
Spider plants (Chlorophytum comosum) are one of the easiest houseplants to propagate — and one of the few that essentially starts the process for you. A healthy, mature plant will produce dangling baby plantlets called spiderettes on long arching runners. Each spiderette is already on its way to becoming a new plant before you even pick up a pair of scissors.
This guide covers every reliable method for spider plant propagation, what to look for before you cut, and how to troubleshoot the most common problem: a mother plant that won't produce babies in the first place. Already growing one? See our Spider Plant care guide for full care details.
When to Propagate
Spring and early summer are ideal — the plant is actively growing, roots establish faster, and the mother plant bounces back quickly. Interestingly, spider plants also tend to produce spiderettes naturally in fall, triggered by shorter days and longer nights. After 3–4 weeks of fewer than 12 hours of light per day, many plants will push out a new flush of babies — so autumn can be a surprisingly productive propagation season too.
That said, spider plants are forgiving enough to propagate year-round in any warm room.
What You'll Need
- Clean pruning snips — sharp, sterile cuts matter
- Small pots with drainage holes (4-inch is ideal for spiderettes)
- Lightweight, well-draining potting mix — a perlite-amended mix works better than heavy standard potting soil
- A clear glass or propagation station for water propagation
- Optional: rooting hormone powder — speeds things up on rootless cuttings
Understanding Spiderettes: What to Look For Before You Cut
Not all spiderettes are ready to propagate. Look at the base of each baby for small knob-like protrusions or tiny white root nubs. A spiderette with these already forming will root significantly faster and more reliably than one without.
If your spiderettes don't have nubs yet, leave them attached. The mother plant is still feeding them, and cutting too early is the primary reason propagation fails.
When ready to cut, snip the runner close to the base of the baby, leaving about a quarter-inch of runner attached. This small stub reduces stress on the emerging roots. The stolon you cut from will often produce new spiderettes, so leave it on the mother plant rather than trimming it away.
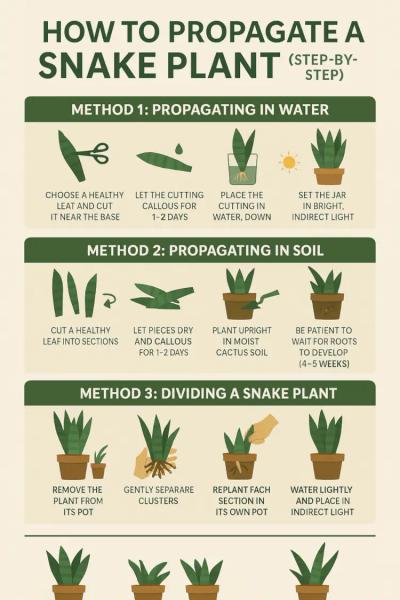
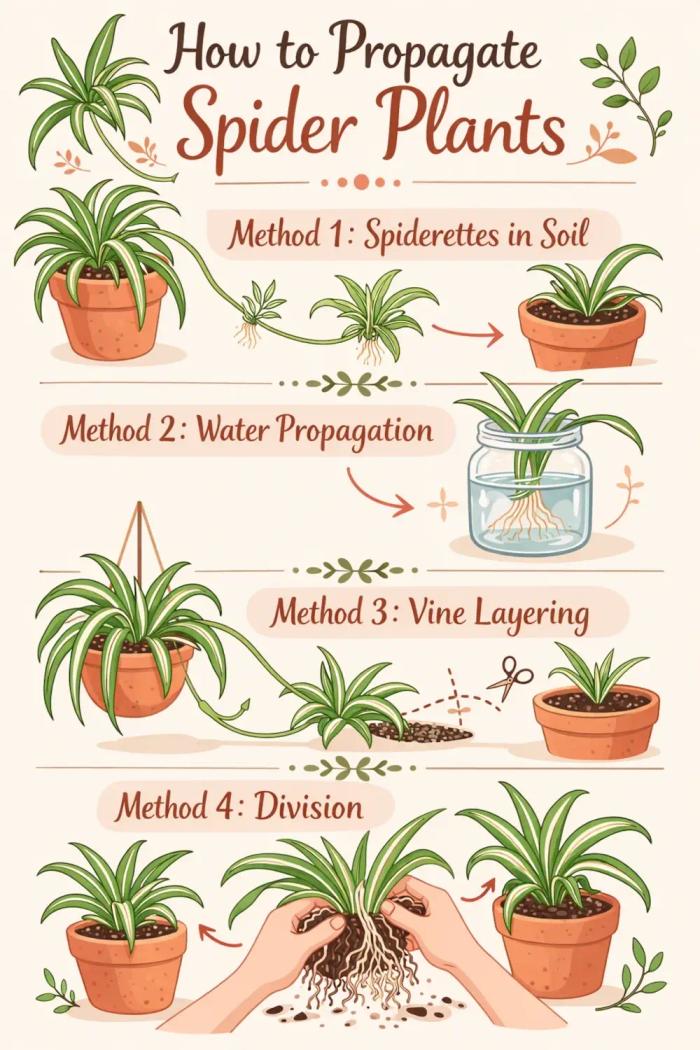
Method 1: Spiderettes in Soil (Recommended)
Soil propagation produces stronger, more robust roots and skips the fragile water-to-soil transition entirely.
- Cut a spiderette with visible root nubs from the mother plant.
- Fill a small 4-inch pot with lightweight, well-draining potting mix. Avoid heavy standard potting soil — it retains too much moisture for new roots.
- Make a small indentation in the center and nestle the spiderette's root nubs into it. Don't bury the leaves.
- Firm the soil lightly around the base and water gently to settle it.
- Place in bright indirect light and keep soil consistently moist but not soggy.
- For faster results, cover loosely with a clear plastic bag or propagation dome for the first week or two.
- New leaf growth signals that roots have established — typically 2–4 weeks.
Plant 3–4 spiderettes together in one pot for a full, bushy plant from the start.
Method 2: Spiderettes in Water
Water propagation is slightly slower but lets you watch roots develop, and research comparing both methods suggests the results are roughly equal — so choose whichever suits you.
- Cut a spiderette with visible root nubs and remove any small leaves around the very base.
- Place in a clear glass or propagation vase with enough water to submerge the root nubs — keep all leaves above the waterline. Submerged leaves rot.
- Place in bright indirect light and change the water every few days.
- Roots typically appear within 1–2 weeks. Once they reach at least 1–2 inches, pot up into soil.
- Keep soil consistently moist for the first week after potting to ease the transition — water roots are softer than soil roots and need time to adapt.
Only use this method if your spiderette already has root nubs visible. A completely rootless cutting placed in water is likely to rot before it roots.
Method 3: Vine Layering (Propagating Without Cutting)
The most hands-off method and the highest success rate — the spiderette stays connected to the mother plant throughout rooting, receiving nutrients the whole time.
- Place a small pot of moist potting mix next to the mother plant.
- Guide a spiderette still on its runner down onto the soil surface of the new pot, pressing its base gently into the soil.
- Keep the soil lightly moist. The spiderette roots itself within 2–3 weeks.
- Once you see clear new leaf growth, snip the runner to free it from the mother plant.
This works especially well for hanging spider plants — position a small pot directly below trailing runners and let gravity do the work.
Method 4: Division
If your spider plant has grown into a large, crowded clump, division is the fastest way to create multiple new plants at once.
- Remove the entire plant from its pot and gently shake off excess soil.
- Look for natural separation points where distinct clumps of leaves and roots can be teased apart. For rootbound plants with tightly packed roots, a clean sterile knife may be needed.
- Separate into 2–4 sections, each with its own roots and leaves intact.
- Pot each section individually in fresh potting mix and water well.
- New growth appears within a few weeks as divisions settle in.
Division works best on mature plants and is a good opportunity to refresh old soil and check for root rot.
Why Is My Spider Plant Not Producing Babies?
This is one of the most common spider plant questions, and the answer is almost always one of three things:
The plant is too young. Spider plants typically need at least a year to establish before producing spiderettes, and some take longer. Patience is the main answer for young plants.
Not enough light. Spider plants produce runners and babies more readily with bright indirect light. A plant in a dim corner may survive but won't put energy into reproduction. Move it closer to a window.
The pot is too large. A slightly rootbound spider plant is actually more motivated to reproduce — crowded roots signal the plant to branch out and spread. If your plant is in an oversized pot with plenty of room to spare, try downsizing. A snug pot encourages baby production.
Bonus tip: Reducing light to under 12 hours per day for 3–4 weeks (as happens naturally in fall) can trigger a new flush of baby production if your plant has stalled.
Common Propagation Problems
Spiderette shrivels after cutting. Cut too early — no root nubs present, or baby was too small. Wait until nubs are clearly visible and the baby has at least 4–6 leaves.
Roots form but plant dies after potting. Transfer water-rooted cuttings to soil while roots are still 1–2 inches, not long and tangled. Keep soil moist for the first week.
No roots after 3+ weeks in water. The cutting likely had no root nubs when cut. Try dusting the base with rooting hormone powder and planting directly in soil instead.
Baby rots at the base. Soil too wet. Use a lighter, more porous mix and reduce watering frequency.
Frequently Asked Questions
How long does spider plant propagation take?
Spiderettes with root nubs in soil establish in 2–4 weeks. Water propagation shows roots in 1–2 weeks but needs additional time before soil transfer. Division is fastest — new growth visible within a few weeks.
Can you propagate a spider plant from a leaf?
No. A single leaf placed in soil or water will not develop roots or grow into a new plant. Spider plants can only be propagated from spiderettes, by vine layering, or by division.
How do I get my spider plant to produce more babies?
Bright indirect light, a slightly rootbound pot, and consistent watering during spring and summer are the main triggers. Reducing light to under 12 hours per day for a few weeks can also prompt baby production.
When should I cut the runner after vine layering?
Wait until the spiderette shows clear new leaf growth — this confirms it has rooted and is feeding itself. Cutting too early can shock a cutting that hasn't fully established.
Can I propagate spider plants year-round?
Yes, though spring and summer are fastest. A warm room with bright indirect light will produce results in any season.
After Rooting
Once established in soil, treat it like a mature spider plant: bright indirect light, water when the top half of the soil is dry — see our spider plant watering guide for a full seasonal breakdown and calculator. Spider plants grow quickly and will produce their own runners and spiderettes once settled — the cycle starts again.
For full care guidance, see our Spider Plant care guide.