
How to Propagate Dieffenbachia (Dumb Cane)
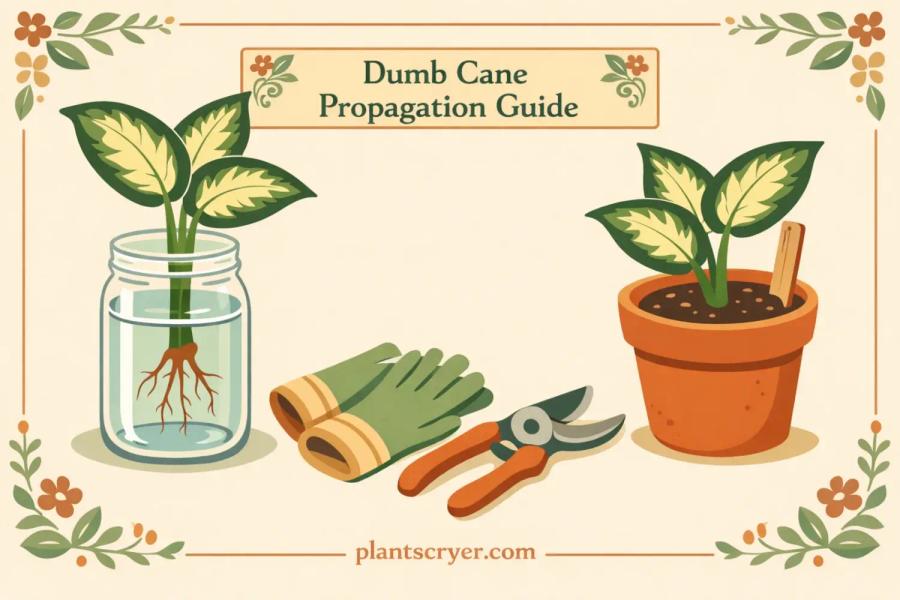
Dieffenbachia is one of the easier houseplants to propagate. The stems root readily in water or soil, cuttings are not fussy, and even a bare stem that looks past saving can produce new plants. The main thing that trips people up is picking the wrong method for their situation, or not knowing what the parent plant will do after they take a cutting.
Before you start: wear gloves every time you handle cut stems. The sap contains calcium oxalate crystals and proteolytic enzymes that cause intense burning on skin and are particularly harmful in the eyes. Wash your hands thoroughly after, even if you wore gloves.
Which Method Should You Use?
There are three ways to propagate dumb cane. The right one depends on what your plant looks like right now.
Tip cutting: the right choice if your plant is healthy and you want more plants, or if the plant has gotten tall and leggy with leaves only at the top. Fast, high success rate. Works in water or soil.
Cane sections: the right choice if you have a bare stem with no leaves left on it. Slower than tip cuttings but lets you get multiple plants from a single stem.
Division: only works on younger plants with multiple stems and no single dominant trunk. If your plant looks like a palm tree with one thick cane, division is not an option.
Method 1: Tip Cuttings
This is the method most people will use. It works whether you want to multiply a healthy plant or fix a leggy one.
What you need: clean pruning shears or a sharp knife, gloves, a glass of water or a small pot of moist potting mix.
Sterilise your cutting tool before you start. Wipe the blade with rubbing alcohol or dip it in a diluted bleach solution and let it dry. Dieffenbachia is vulnerable to bacterial infection through fresh cuts, and a dirty blade can introduce problems that show up weeks later when you're wondering why the cutting isn't rooting.
Find a healthy stem and cut 4 to 6 inches below the lowest leaf, making sure at least one node is included on the cutting. Nodes are the slightly raised rings around the stem where leaves emerge, often a slightly different colour than the surrounding stem. Roots will grow from the node, so it must be on the cutting, not left on the parent plant.
Remove any leaves from the lower half of the cutting, leaving two or three at the top. Lower leaves sitting in water or buried in soil will rot.
Rooting in water: Place the cutting in a clean glass with enough water to submerge the node but keep the remaining leaves clear. Put it somewhere with bright indirect light and change the water every three to four days to prevent bacterial buildup. Roots usually appear within two to four weeks. Once they're two to three inches long, pot the cutting into moist potting mix.
One thing worth knowing: roots that develop in water are structurally different from roots that develop in soil. They're less robust and can struggle with the transition to a denser medium. Pot into a light, well-draining mix and keep it consistently moist for the first few weeks to give the roots time to adapt.
Rooting in soil: Place the cutting directly into a small pot of moist potting mix, burying the node and any bare stem below the lowest remaining leaf. Water it in and place in bright indirect light. Keep the soil consistently moist but not soggy. Roots form more slowly than in water but the plant transitions better once established, since the roots develop suited to their final medium from the start.
What happens to the parent plant? After you take a tip cutting the stem you cut from will push out new growth from the first node below the cut. This often produces two shoots rather than one, which makes the plant bushier over time. Leave the cut stem in place and continue watering as normal.
Method 2: Cane Sections
If your dieffenbachia has a long bare stem with no leaves, cane sections let you salvage it. Each section of stem with a node can produce a new plant.
What you need: a clean, sharp knife, gloves, a shallow tray or individual pots of moist potting mix.
Cut the bare stem into sections 2 to 3 inches long, making sure each section has at least one node. Before you start cutting, mark the top of each section with a small notch or a piece of tape. Cane sections only root from the bottom end, and if you plant them upside down nothing will happen.
Let the cut sections sit uncovered for a few hours to allow the cut ends to dry slightly. This reduces the chance of rot setting in before the section can callous.
Plant each section vertically with the marked top end up, burying about half its length in moist potting mix. Alternatively, lay sections horizontally and cover with about an inch of mix, making sure any visible nodes face upward. The horizontal method works well if you have multiple sections and want to use a shallow seed tray.
Unlike tip cuttings, cane sections don't need bright light while rooting since there are no leaves to photosynthesize. A warm spot with low to moderate light is fine while you wait.
Keep the mix consistently moist and warm. Cane sections root more slowly than tip cuttings, typically three to eight weeks, before you'll see any sign of growth. The first sign is usually a small green shoot pushing up from the soil, not visible roots. Don't dig them up to check.
One section can produce multiple shoots if it has more than one node, which makes this method good value when you have a long bare stem to work with.
Method 3: Division
Division works by separating a multi-stem plant at the roots, giving each section its own root system. It's the fastest method for getting an established plant quickly, because each division already has roots rather than needing to develop them.
The catch is timing. Division only works on plants that haven't yet developed a single dominant trunk. If your dumb cane has multiple stems emerging from the base with visible offshoots or suckers, you can divide it. If it has grown into one thick cane, skip this method and use cuttings instead.
Spring is the best time, ideally when you're repotting anyway.
Take the plant out of its pot and shake or brush away as much soil as you can from the root ball. With a clean knife or your hands, separate the stems, making sure each division has a healthy portion of roots attached. If roots are tangled, work slowly rather than tearing. Cut only where you have to.
Plant each division in its own pot with fresh well-draining potting mix at the same depth it was growing before. Water in and place in bright indirect light. Hold off on fertilising for four to six weeks to give the roots time to settle.
Can You Propagate Dieffenbachia from a Leaf?
No. Dieffenbachia cannot be propagated from a leaf alone. You need a section of stem with at least one node. A leaf pulled from the plant, even with a bit of petiole attached, will not produce roots or a new plant. If you see a method online suggesting leaf cuttings work for dumb cane, it's inaccurate.
Best Time to Propagate
Spring and early summer give the fastest results. The plant is actively growing, temperatures are warmer, and cuttings root more quickly.
Indoor propagation works year-round if you can keep temperatures above 65°F and provide bright indirect light. A dumb cane on a warm windowsill in January will still root a cutting, just more slowly than in May.
Aftercare for New Plants
Keep new plants in bright indirect light and away from drafts. Water when the top inch of soil is dry. New cuttings are more vulnerable to rot than established plants, so err toward slightly drier rather than constantly wet.
Hold off on fertilising for at least four weeks after potting. The roots need time to establish before they can handle feeding, and fertilising too early can burn underdeveloped roots.
Once you see consistent new leaf growth, the plant is established and you can treat it the same as any mature dumb cane.
A Note on Safety
Every step of propagating Dieffenbachia involves contact with cut stems and sap. The calcium oxalate crystals in the sap cause immediate burning on skin and serious pain if they reach your eyes. Eye contact can cause corneal damage. It is not a plant to handle casually without protection.
Wear gloves for every cut. If sap gets on skin, wash with soap and water for at least 15 minutes. If it reaches your eyes, rinse immediately with water for at least 15 minutes and seek medical attention.
Keep cut stems and discarded leaves away from pets and children. The same crystals that cause burning in humans cause intense oral pain, drooling, and swelling in cats and dogs. Even a small amount of chewing on a cut stem can cause a reaction that needs veterinary attention.
Frequently Asked Questions
Tip cuttings are the easiest method. Cut a 4 to 6 inch section of healthy stem with at least one node, remove the lower leaves, and root it in water or moist potting mix. Roots appear in two to four weeks in water, slightly longer in soil.
No. Dieffenbachia needs a section of stem with at least one node to propagate. A leaf alone, even with the petiole attached, will not produce roots or a new plant.
Tip cuttings in water typically root in two to four weeks. Cuttings in soil take four to six weeks. Cane sections are the slowest, often three to eight weeks before you'll see a shoot emerge from the soil.
The stem you cut from will push out new growth from the first node below the cut, often producing two shoots rather than one. Leave the stump in place, water as normal, and new leaves will emerge within a few weeks.
Yes. Place the cutting in a clean glass with enough water to submerge the node but keep the leaves above the waterline. Change the water every three to four days. Once roots are two to three inches long, transfer to potting mix and keep the soil consistently moist for the first few weeks while the roots adapt.
Spring and early summer are ideal since the plant is actively growing and cuttings root faster in warm conditions. Indoor propagation works year-round as long as the plant has bright indirect light and temperatures stay above 65°F.
No. Dieffenbachia roots readily without it. Rooting hormone may slightly speed up the process but is not necessary and most successful propagations skip it entirely.
For full care guidance see the Dieffenbachia care guide.